
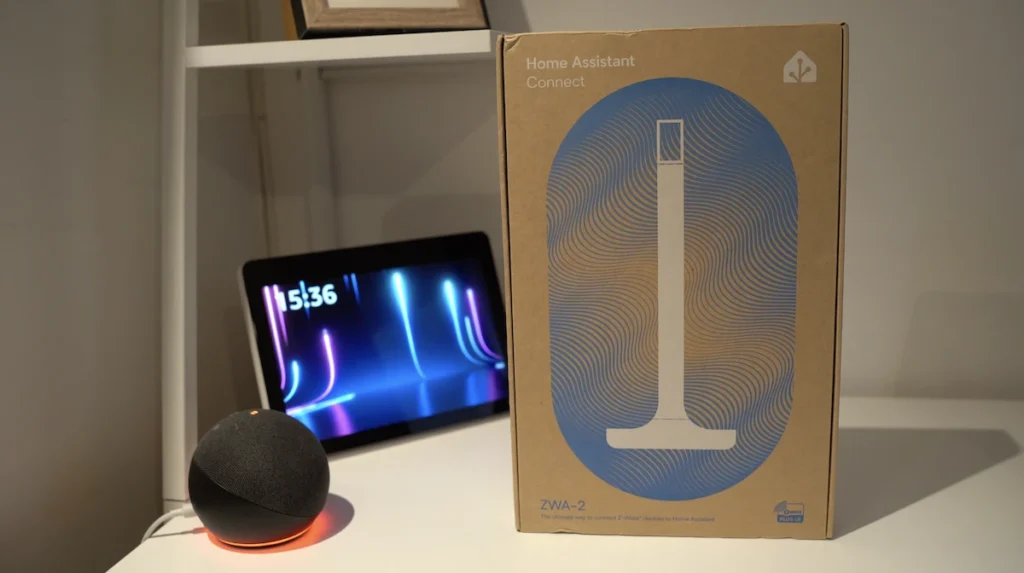
Home Assistant presents an innovative product, a Home Assistant Connect ZWA-2 Z-Wave antenna, allowing you to enjoy the best conditions for using smart devices with this Z-Wave technology.
Why is the ZWA-2 Z-Wave antenna so expensive?
ZWA-2 is more than a traditional Z-Wave dongle. This device has a base with antenna, integrates the Z-Wave 800 and the Long Range function to offer the best performance with this technology.

Advantages and Disadvantages of Home Assistant Connect ZWA-2
Advantages
- Z-Wave antenna: By working with a base with antenna, you will have the best Z-Wave communication performance.
- Z-Wave 800: ZWA-2 integrates the latest advances in Z-Wave technology.
- Long range: The Long Range is a function that offers a direct range of 1.5 km in free field, which could be 50 to 300 metres indoors.
- Official Home Assistant product: Being a product designed by the company Nabu Casa, creator of the Home Assistant project, we guarantee the best performance.
- Price : As it is more than a simple Z-Wave USB dongle, it has a higher price.
Disadvantages
- Size: This Z-Wave antenna takes up space, so you must take this criterion into account.
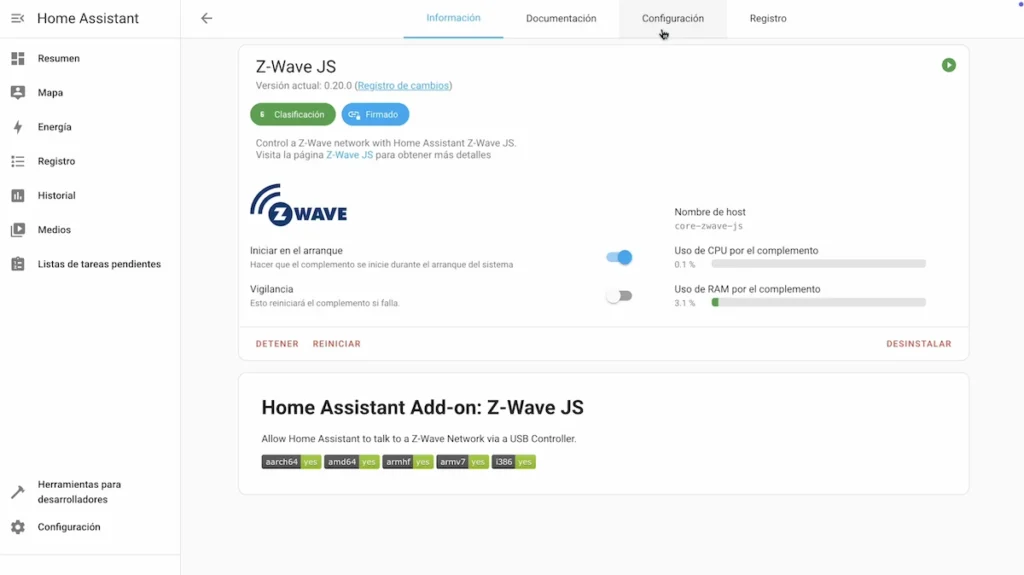
Tutorial on how to use Home Assistant Connect ZWA-2
Home Assistant is an Open Source home automation solution adopted by more than 2 million users around the world that allows you to unify your smart home in a single interface by mixing multiple brands and popular technologies on the market.

Speaking of technologies, one of the most powerful is Z-Wave, which has been in the shadow of Zigbee for the last few years because there was not much dynamism in the market.
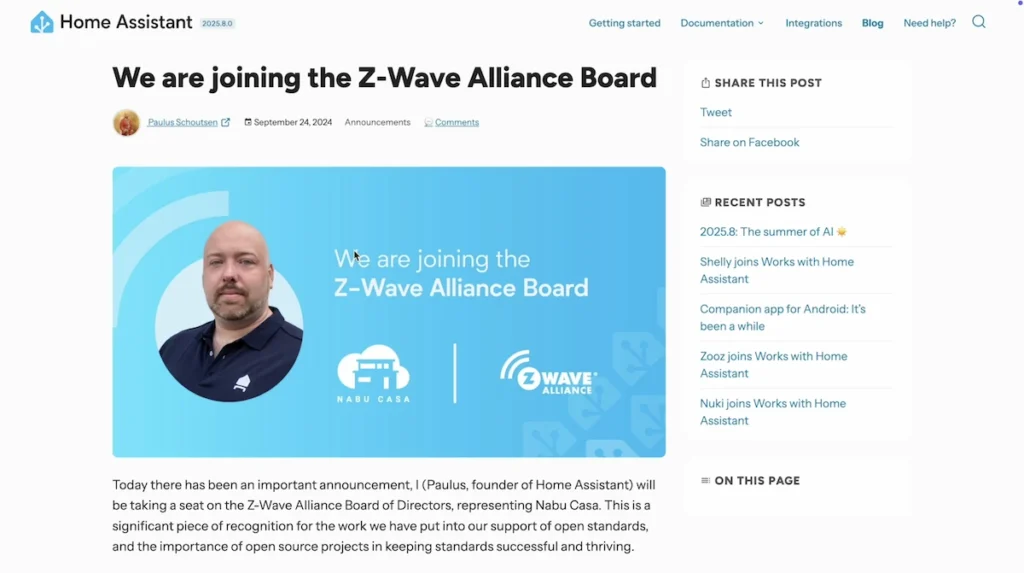
But with Home Assistant founder Nabu Casa recently joining the Z-Wave alliance, it was a sign that a project was being born.
Let’s discover the details of this new Home Assistant device.
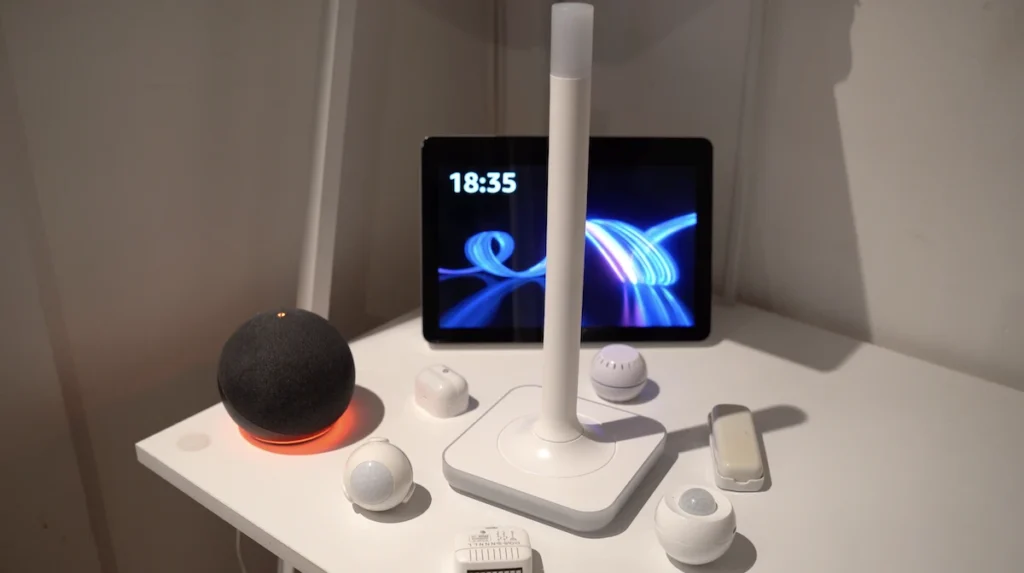
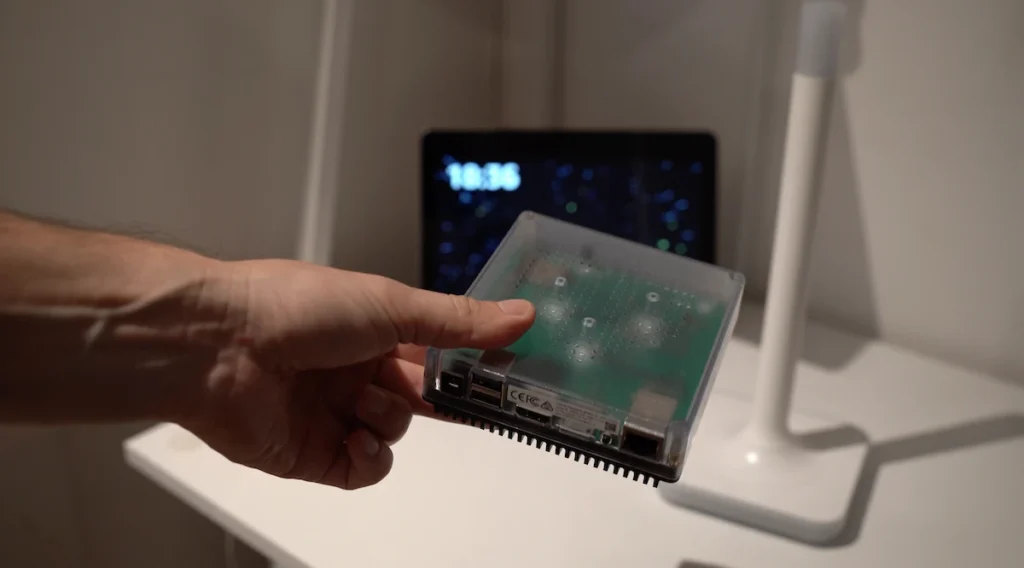
General characteristics of the ZWA-2 antenna
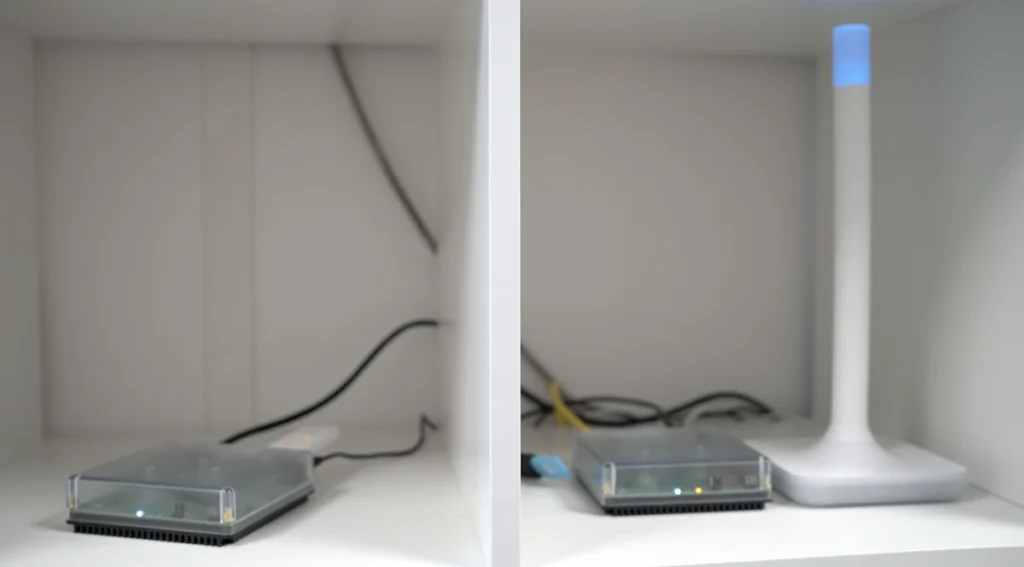
This device is very different from the ones we used to know, which are usually USB dongles that we plug directly into the USB ports of our home automation hubs.
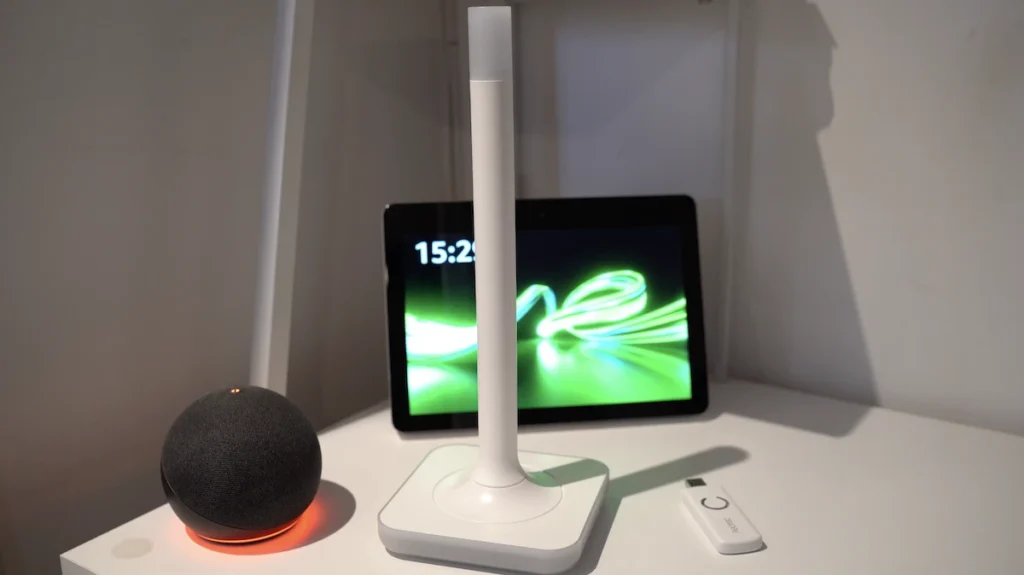
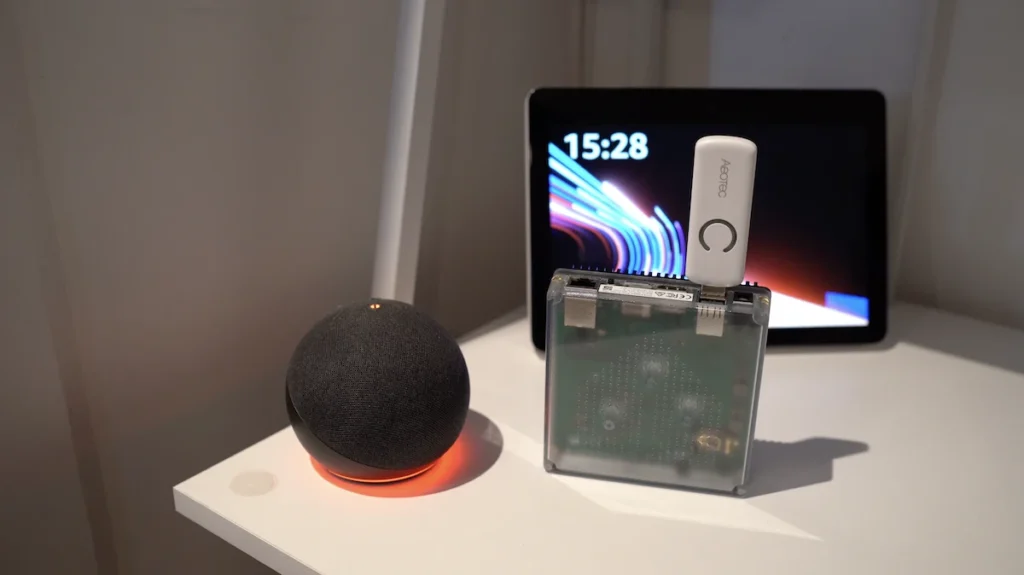
In this case, ZWA-2 comes with a white base and antenna, integrating the latest version of Z-Wave technology, 800 series, with the Long Range function that promises a direct communication range of up to 1.5 km in free field.

But it should be 50 to 300 metres in real-life conditions in a house or building, depending on the environment and obstacles such as the type and thickness of walls, furniture and other devices that may affect this range.

And Z-Wave is a technology designed to be backwards compatible, meaning that even if this antenna incorporates Z-Wave 800, you can always use Z-Wave 100, 300, 500, 700 and, of course, 800 devices.
If you are starting from scratch, it would be interesting to opt for Z-Wave devices with the 800 series to enjoy the best performance in terms of range, security and speed of communications and with lower battery consumption among the outstanding features.
Companies like Shelly or Zooz have a variety of devices with this 800 series.
So, whatever your Z-Wave device is, you will be able to use it with this ZWA-2 antenna.
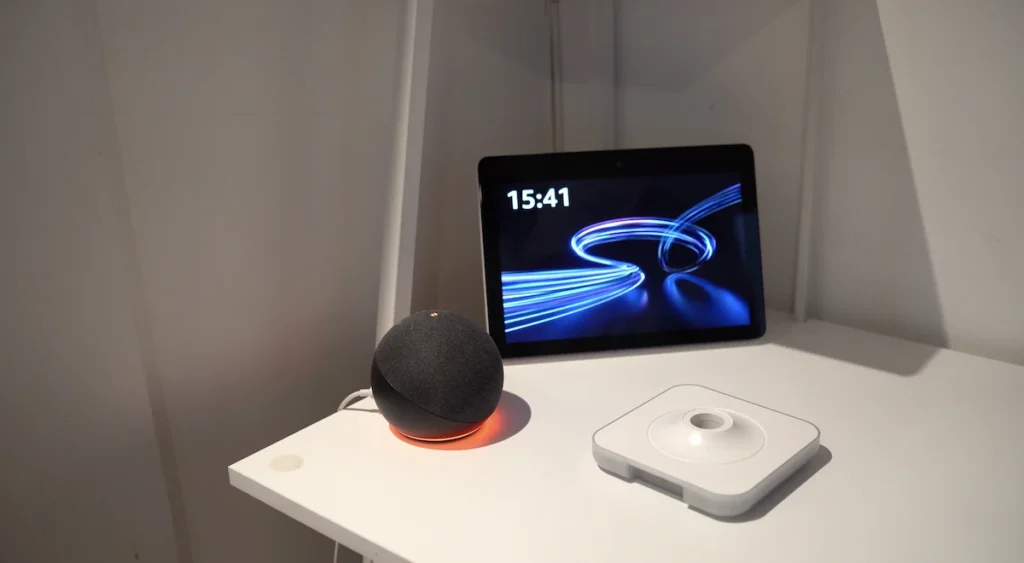
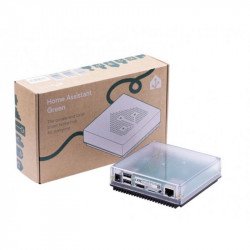
Of course, in addition to this antenna, you need a compatible home automation hub with a USB 2.0 port, such as Home Assistant Green, the official hub from the same company that manufactures this antenna.
In the case of Home Assistant, you must have software 2025.7 or higher installed.

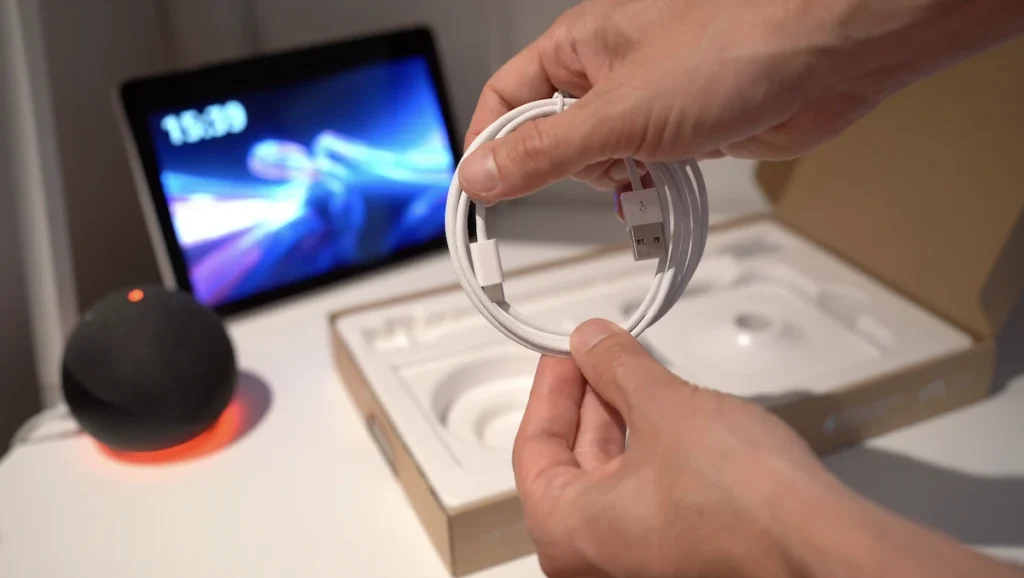
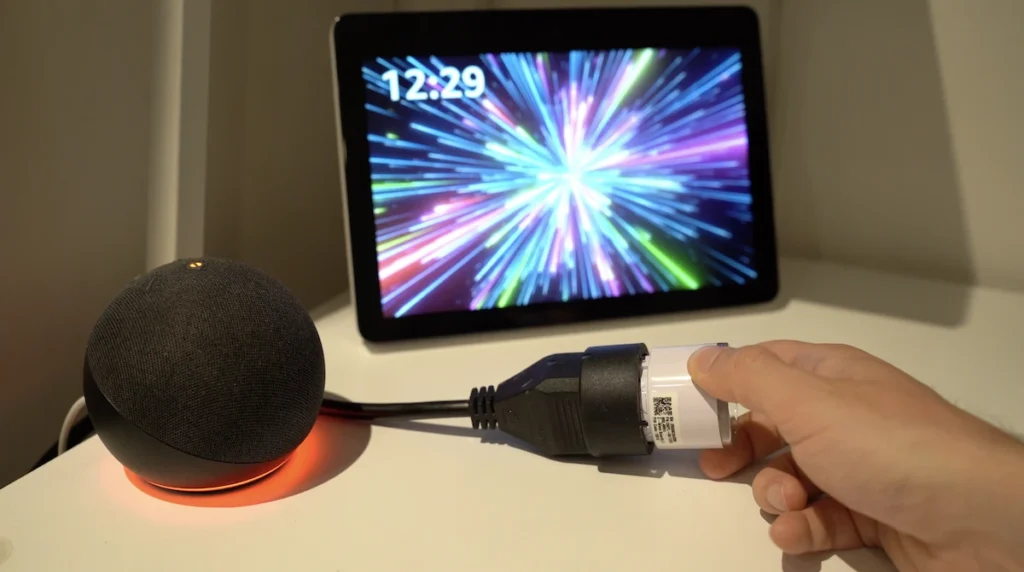
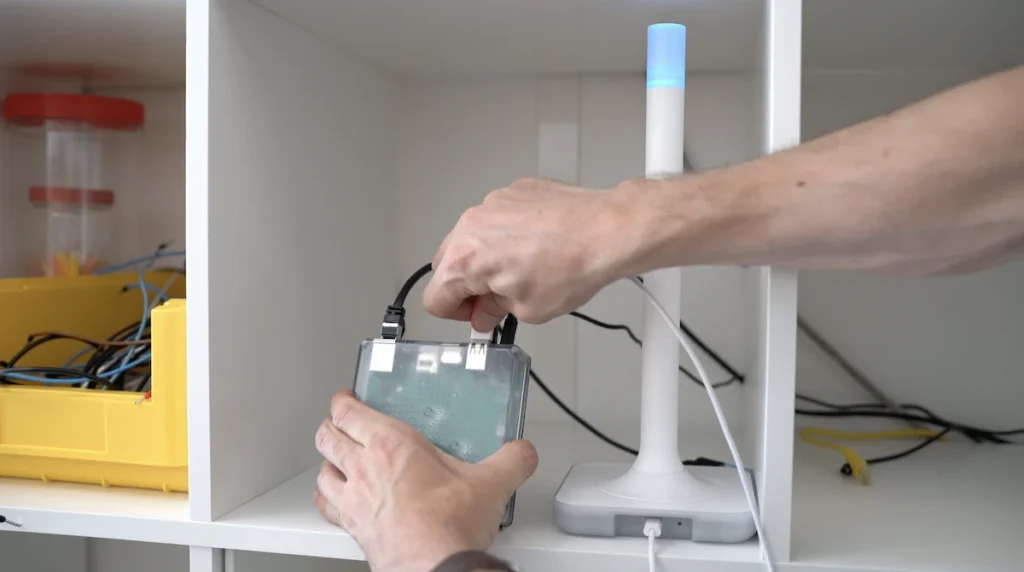
This Z-Wave antenna comes with a 1.5m USB-A to USB-C cable, which is handy for keeping it away from potential sources of interference for best performance.
And on the top of the antenna, you have an LED indicator that will change colour according to different events.

How to install Home Assistant Connect ZWA-2
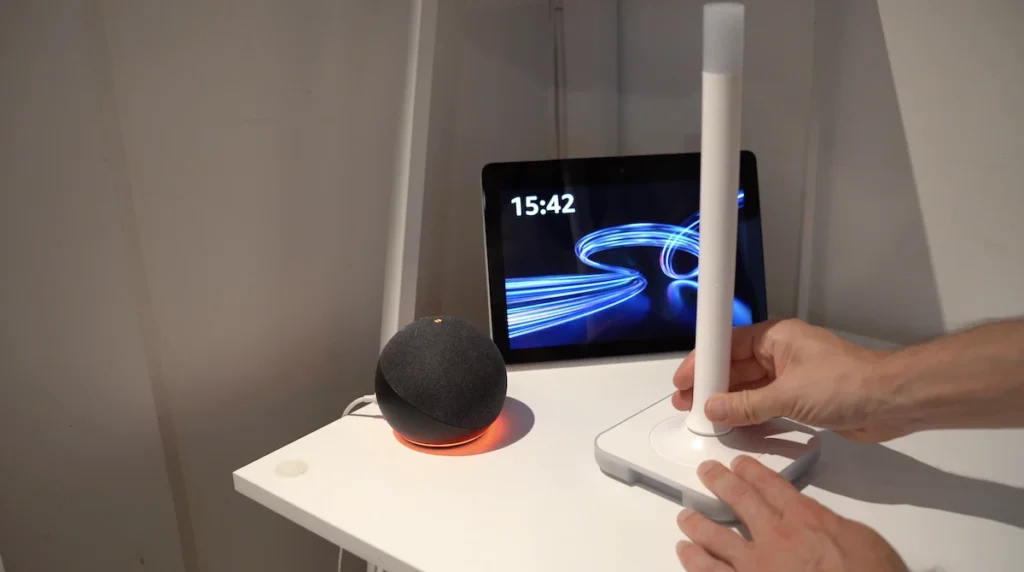
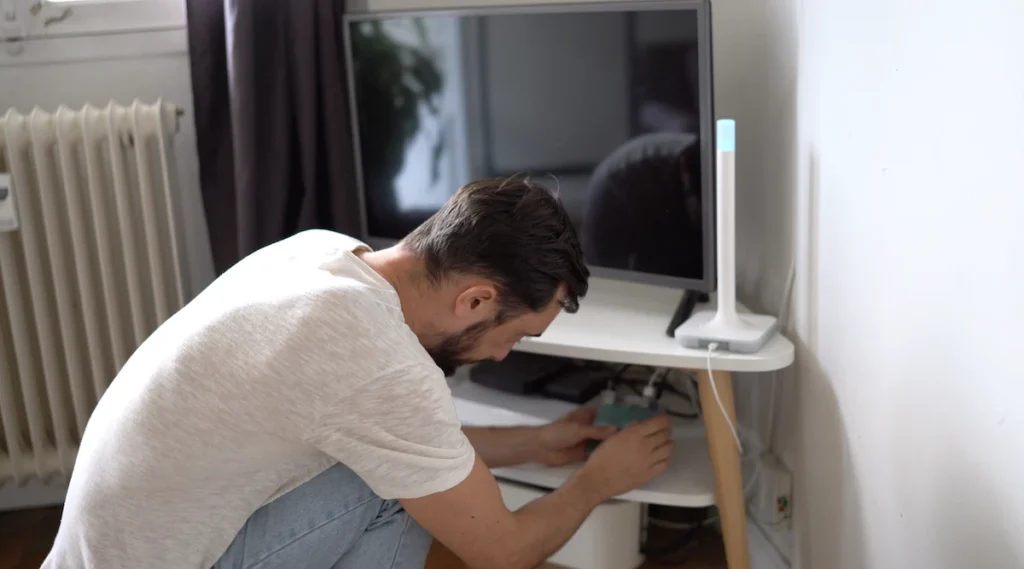
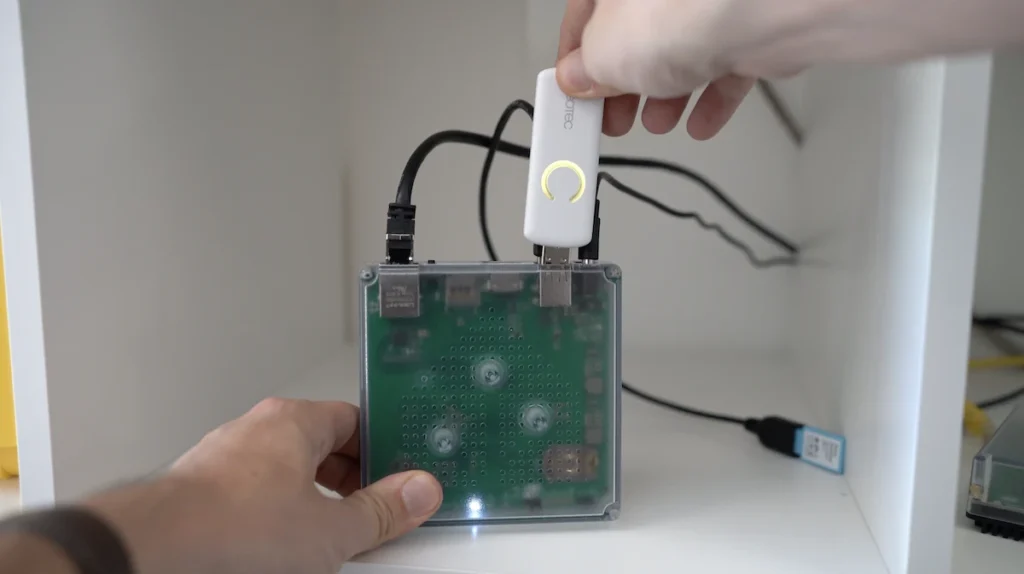
To install this antenna, the first thing you should do is to place your base in a strategic area, and it has to be horizontally on top of a piece of furniture and not vertically on the wall and the company Nabu Casa recommends moving this antenna away from sources that can cause interference, such as metal surfaces, transmitters like computers or routers, aquariums and any other element that can affect its performance.
Screw the antenna on top of the base.
Now, you must plug the USB-C part of your cable into the USB-C port of your ZWA-2 dock and the USB-A part of the cable into the USB 2.0 port of your Home Assistant hub.
How to set up Home Assistant Connect ZWA-2
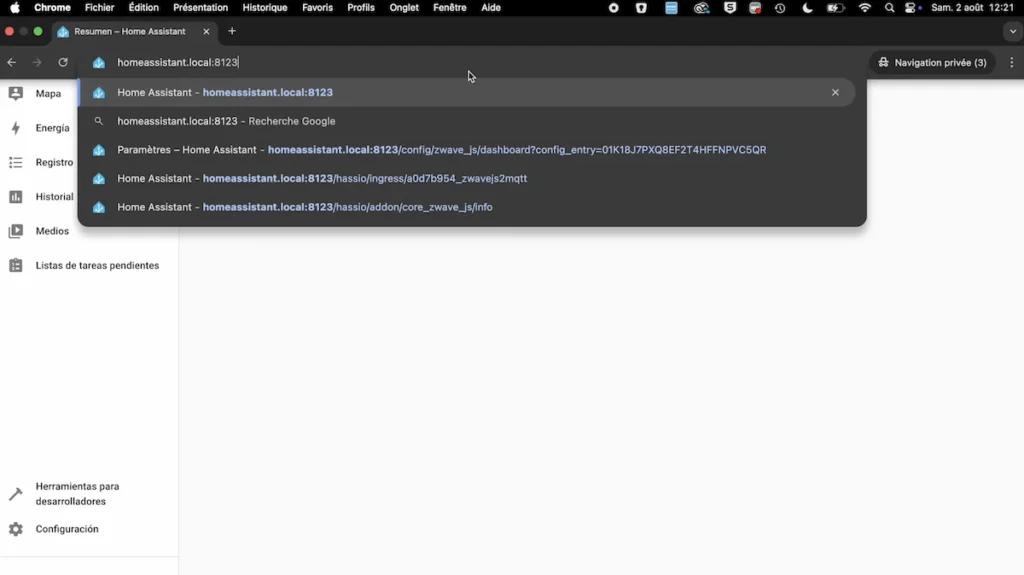
If you are starting from scratch with Z-Wave technology, the process is very simple. You have to go to your Home Assistant interface. In my case, I use the Home Assistant Green hub, so I can access the Home Assistant Green interface from a web browser by clicking: http://homeassistant.local:8123/
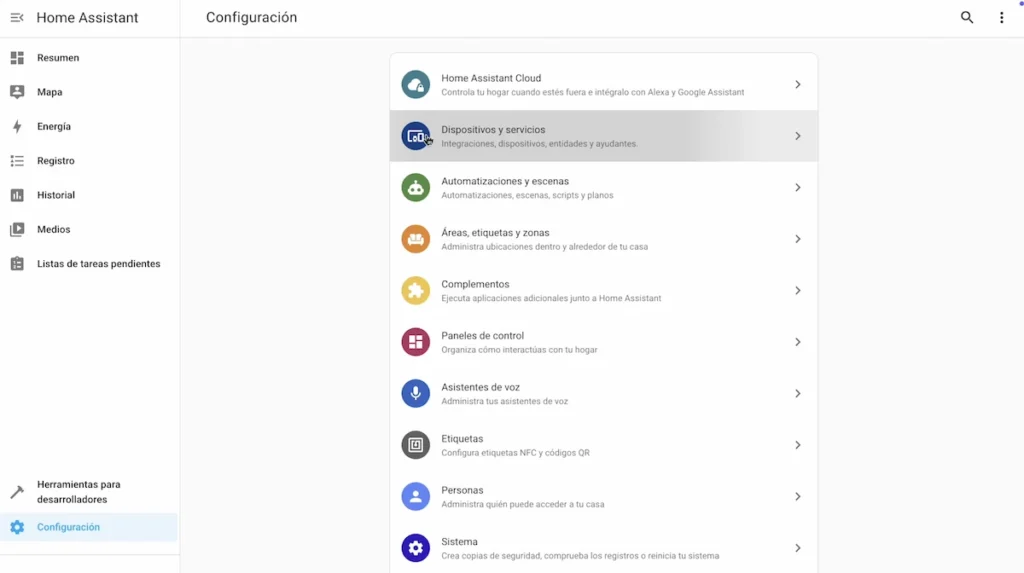
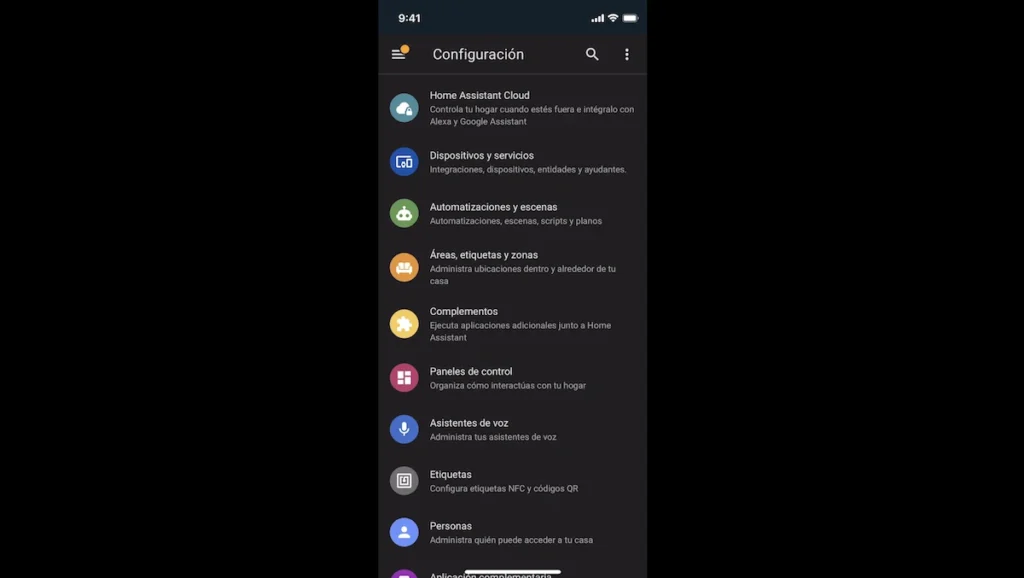
And we must go to “Settings”.

And “Devices and services”.
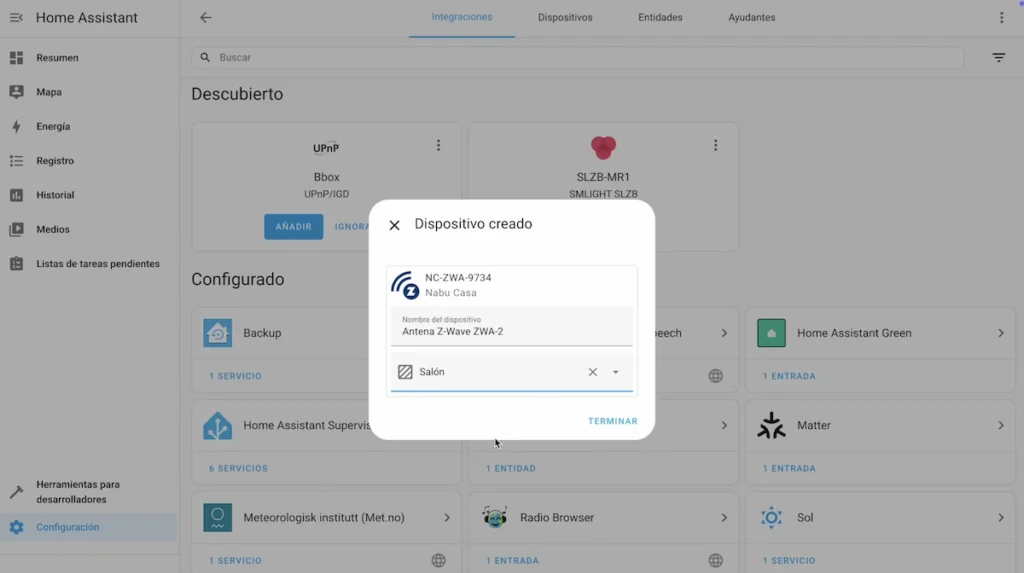
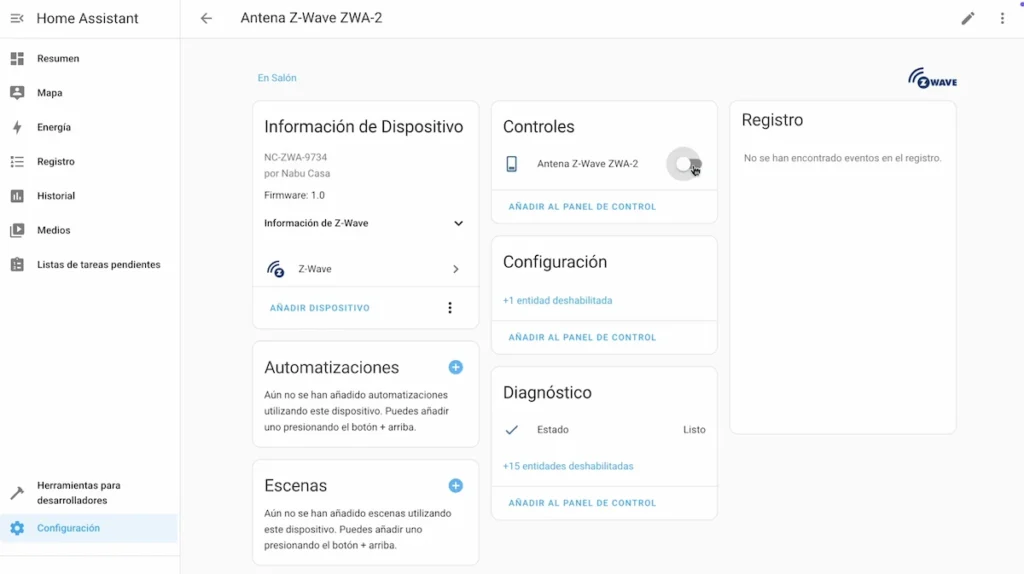
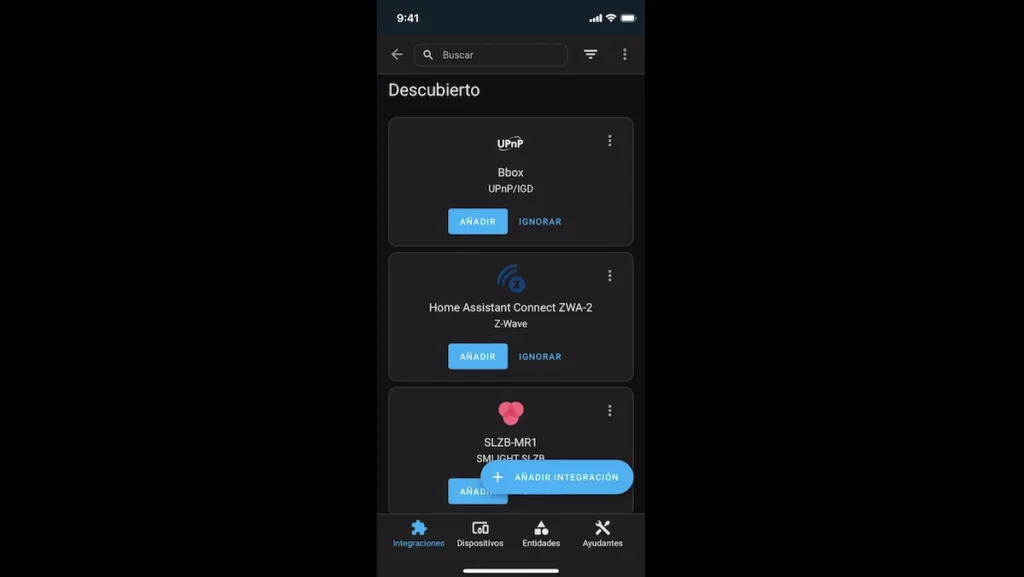
Your Home Assistant Connect ZWA-2 antenna should automatically appear in “Discovered” and you should click “Add”.

You can choose the option “Recommended installation”.

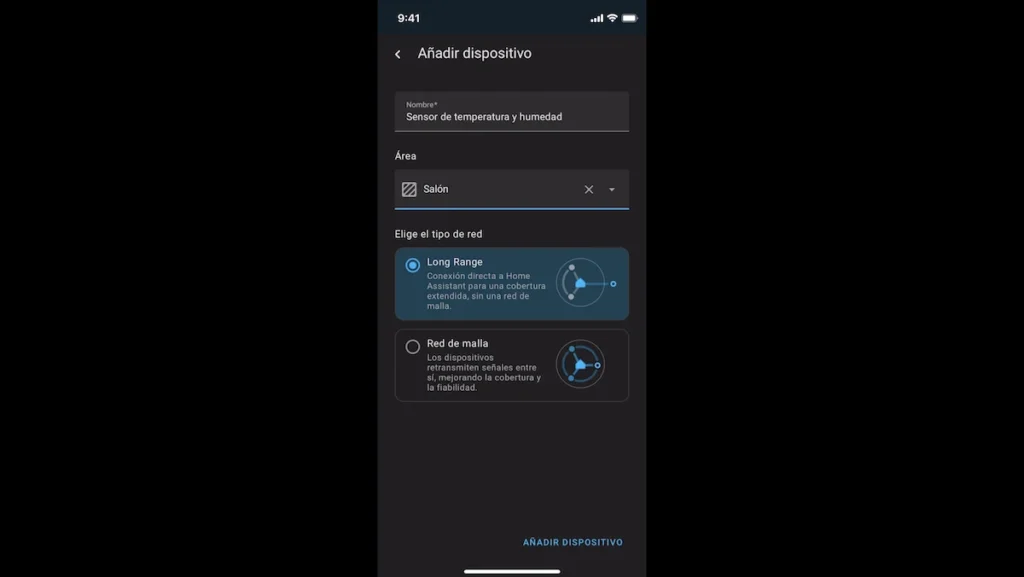
After a few seconds, your device corresponding to your Z-Wave antenna has been created and you can give it a personalised name and place it in an area of your home.
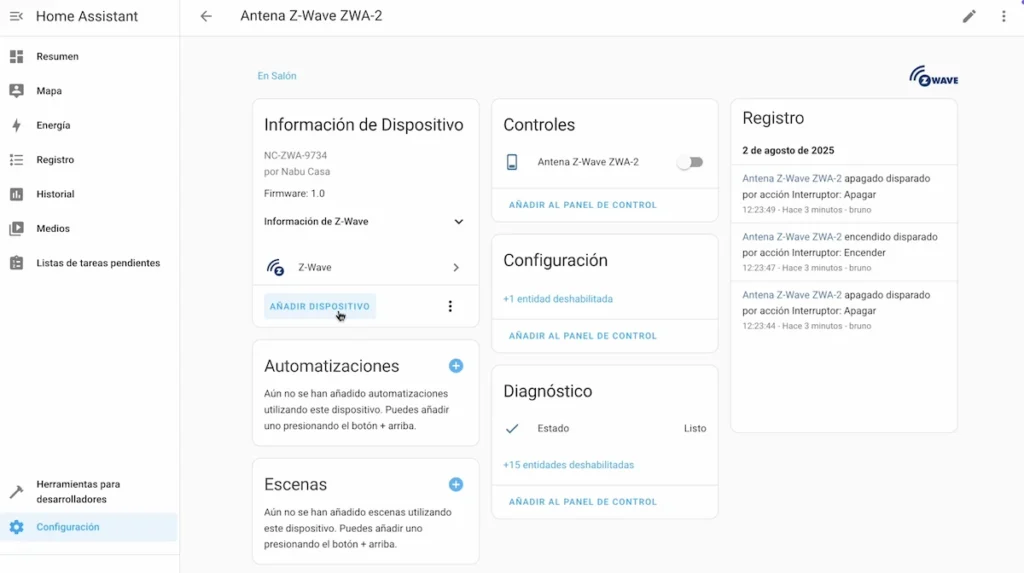
Now you have your Z-Wave antenna available to add Z-Wave devices to Home Assistant, and you can also modify settings such as turning off the LED indicator on the antenna, which can be a nuisance.
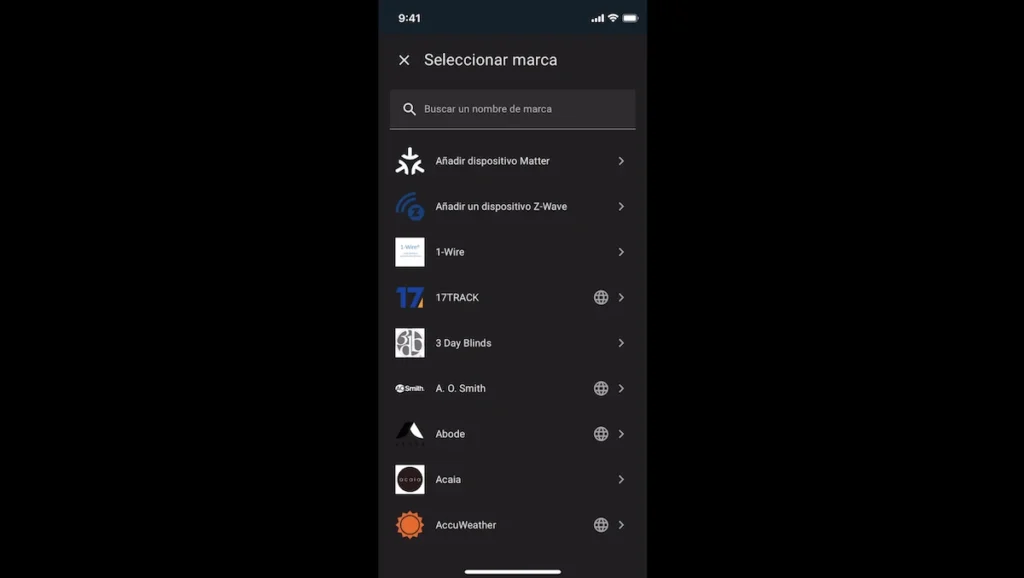
How to include or exclude Z-Wave devices
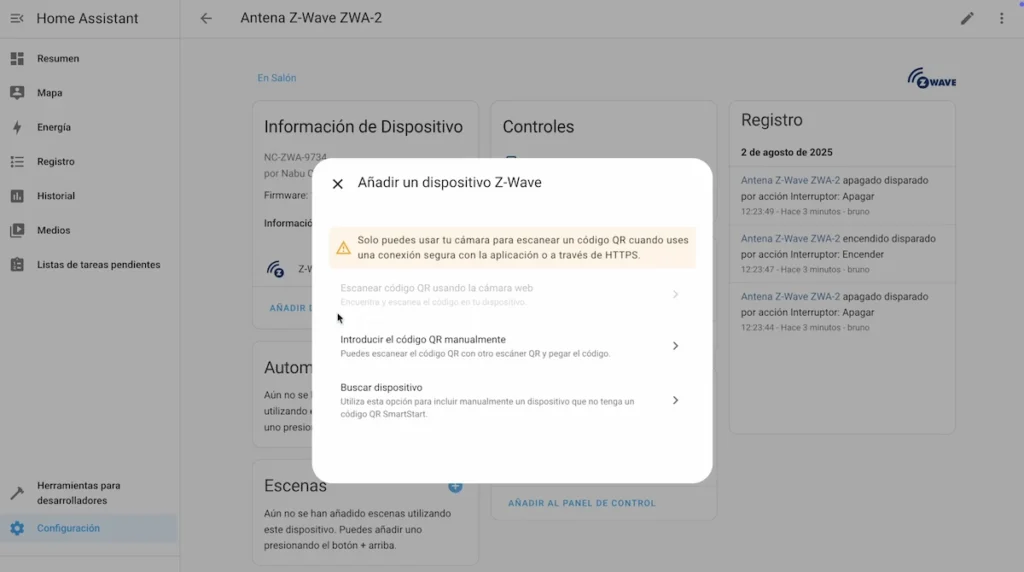
To include each Z-Wave device, the process is similar. From the interface of your Z-Wave ZWA-2 antenna, you have the option “Add device” to start the inclusion mode.
You must choose an opt-in option between “Scan QR code using webcam”, “Enter QR code manually” or “Search for device”, which works for any device, old or new.
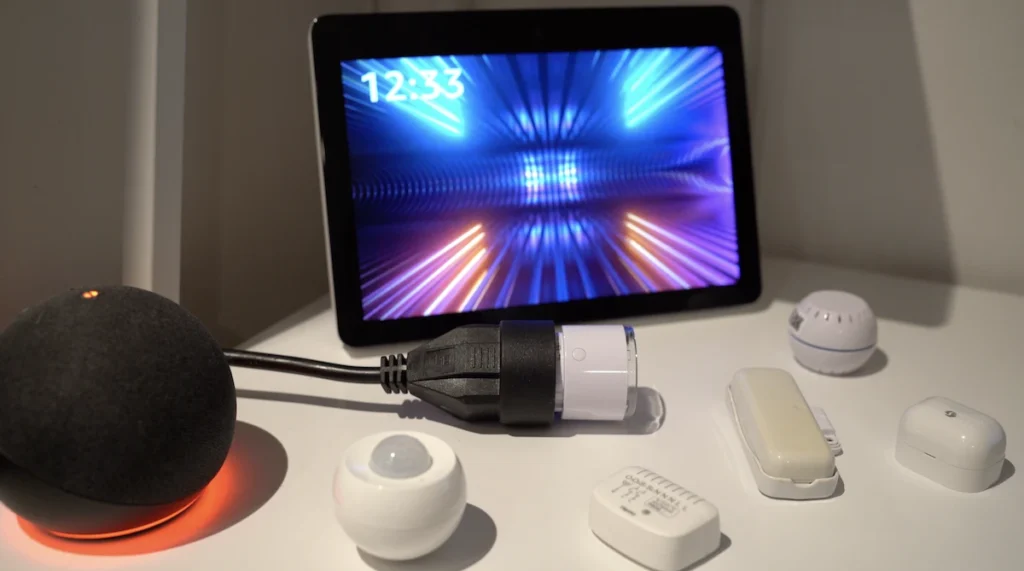
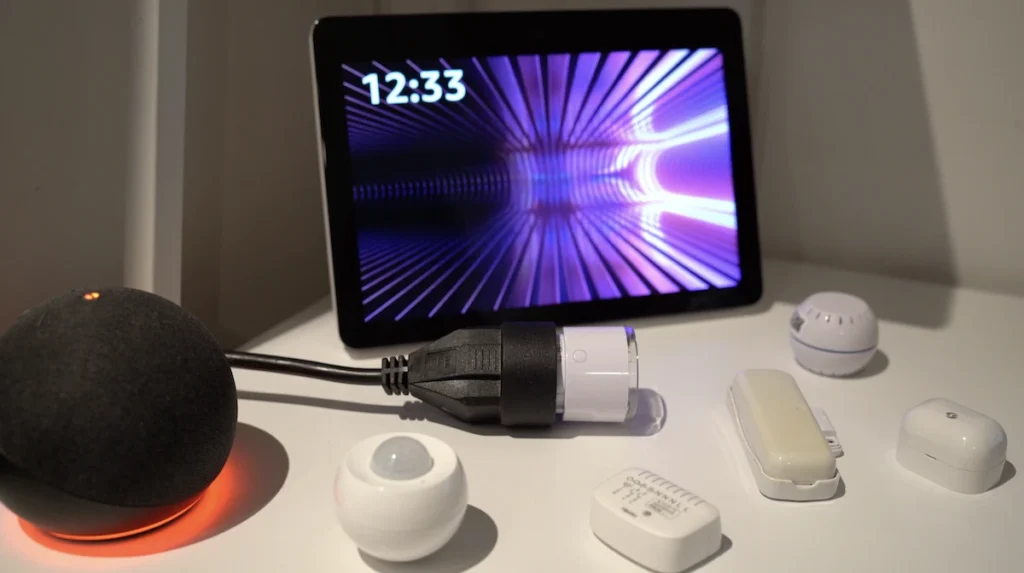
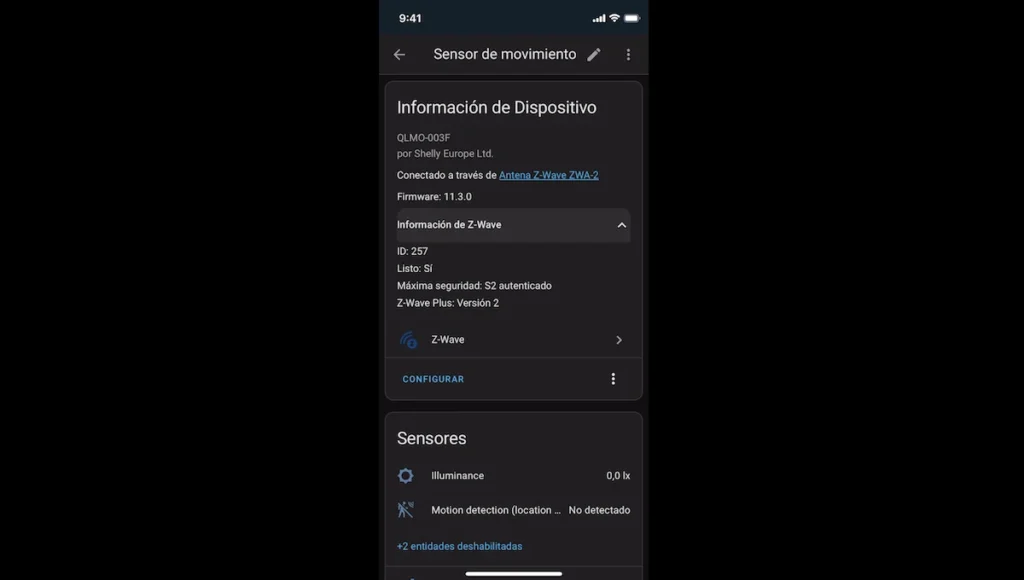
In my example, I am going to include a Shelly Z-Wave socket so I put this socket in inclusion mode following the manufacturer’s instructions.
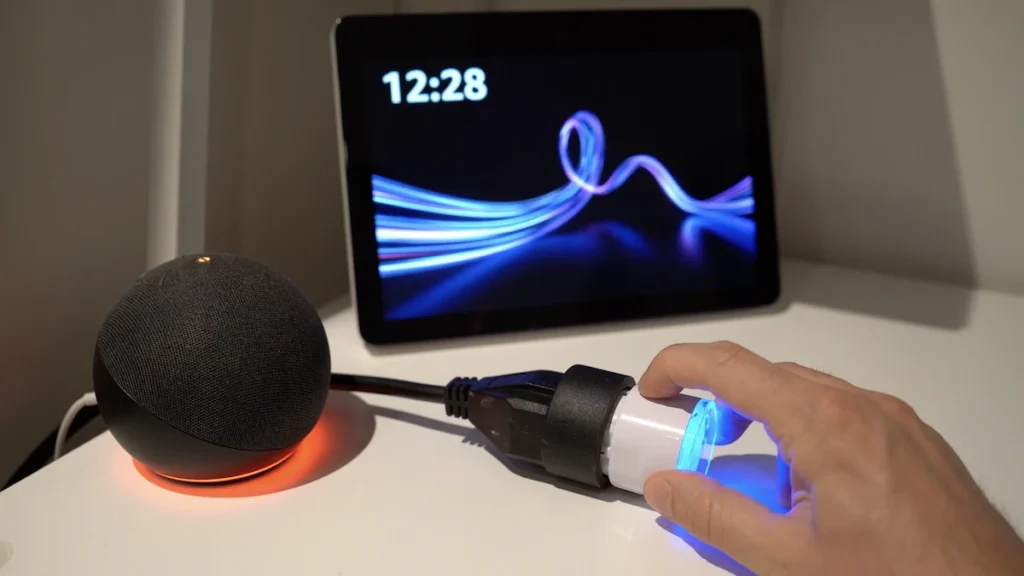
As it is a Z-Wave 800 device and for more secure communications, I must indicate its PIN code which can be found on the label of the device and, in some cases, also on top of the packaging.
Ready, I can rename it and place it in an area of our house.

I now have control of this socket in Home Assistant.

I can repeat the same process, this time with an old Z-Wave device. I put this sensor in inclusion mode and that’s it, it appears in my Home Assistant interface and I can see when a door or window opens or closes.

As you can see, both the latest generation device and a very old one can work perfectly with this Z-Wave Home Assistant Connect antenna.

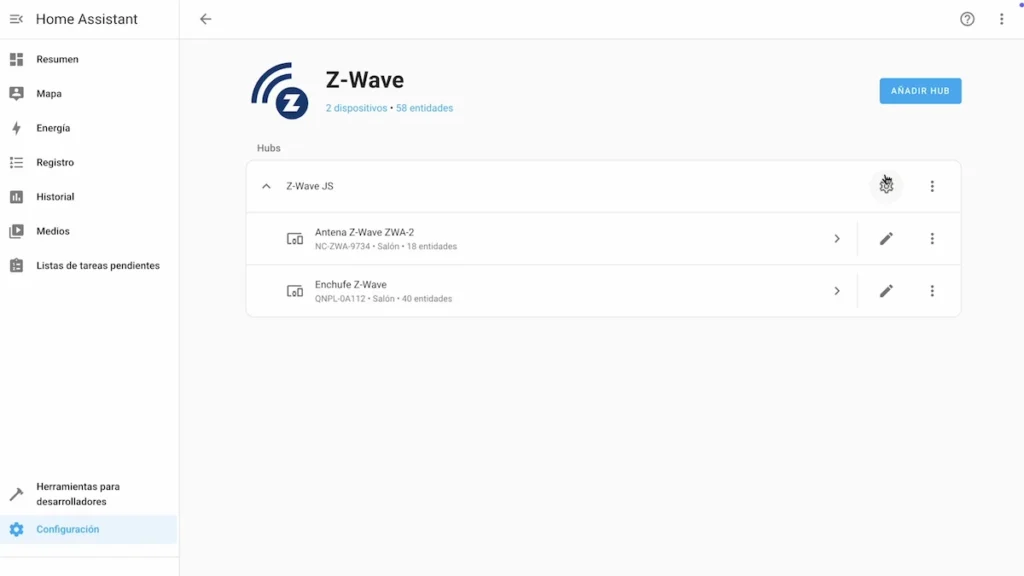
It should be noted that, if you have difficulties to include a Z-Wave device, you can exclude it beforehand even if it has never been linked in the Z-Wave network of your hub. To do this, in the configuration interface of your ZWA-2 antenna, click on “Z-Wave”.

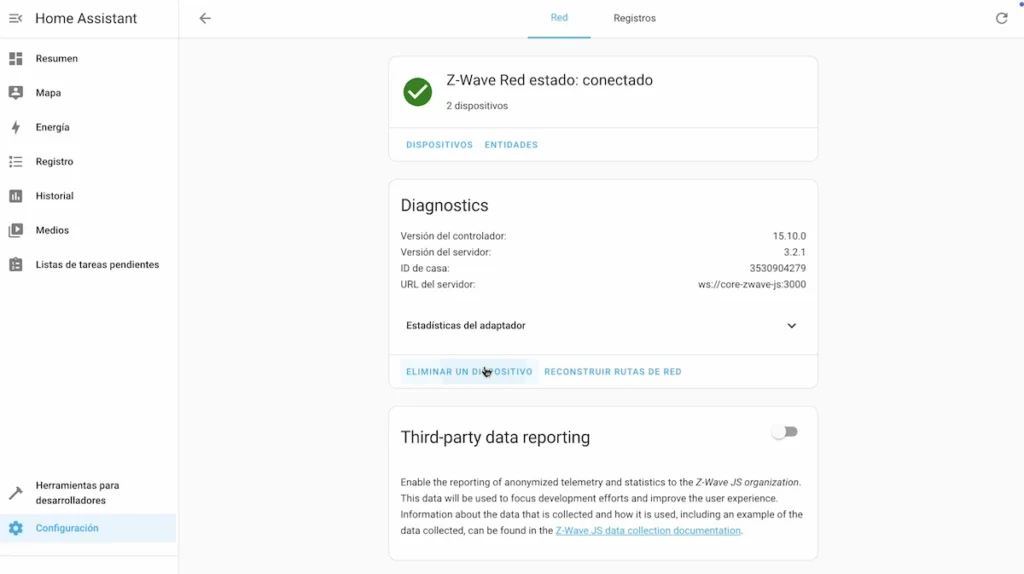
Now you must click on the configuration icon.
And under “Delete a device”.
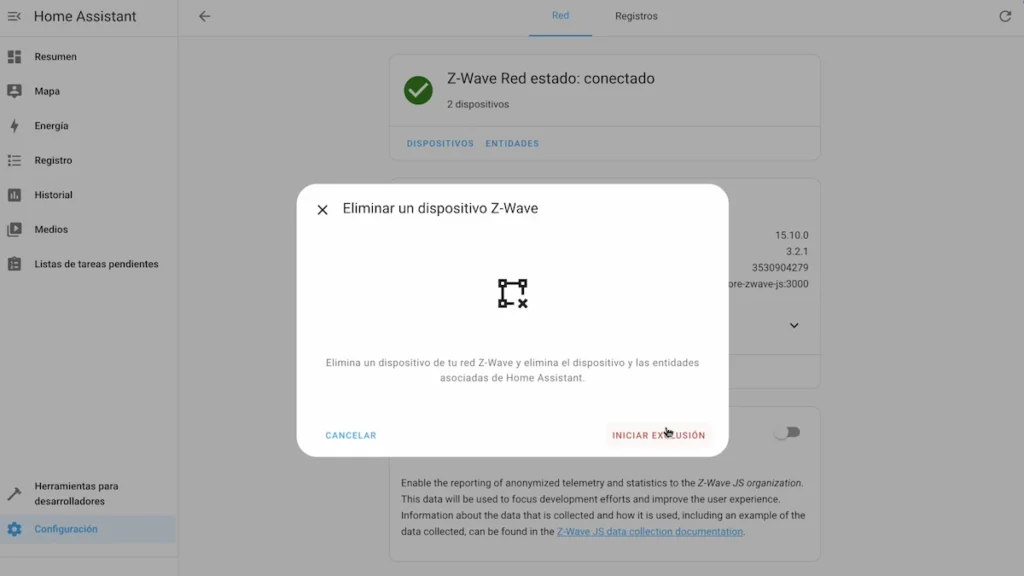
A pop-up window appears and you can click on “Start exclusion”. At this point, you can exclude your Z-Wave device and you will now be able to include it in your Z-Wave network by following the above steps without any difficulties.
How to migrate an old Z-Wave installation
In case you already have a Z-Wave installation with an old Z-Wave dongle and you want to migrate this installation to your ZWA-2 antenna, it is possible to do so and thus avoid having to exclude and include all your devices one by one.

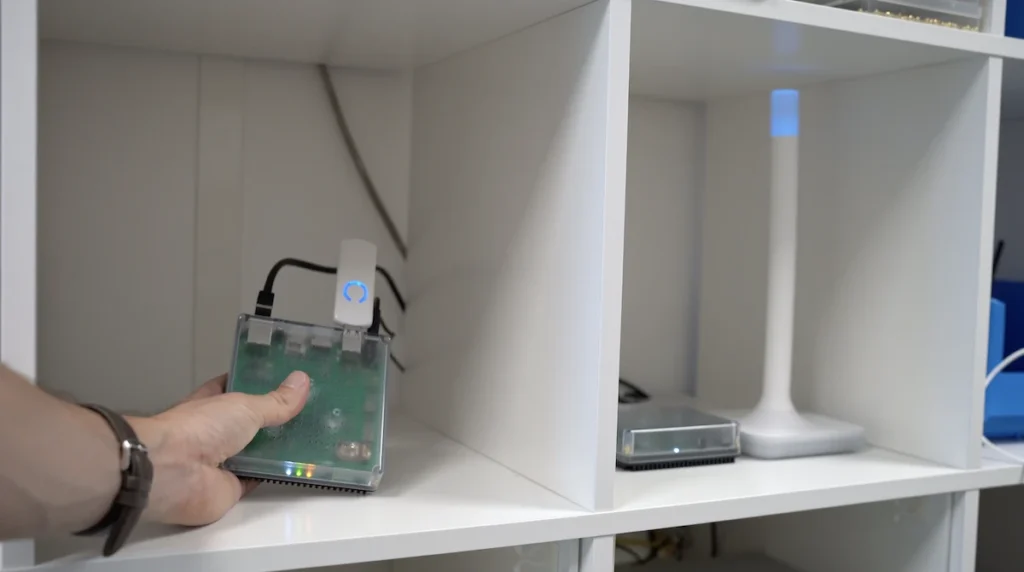
In my example, I have an Aeotec Z-Wave 500 dongle with different linked devices.
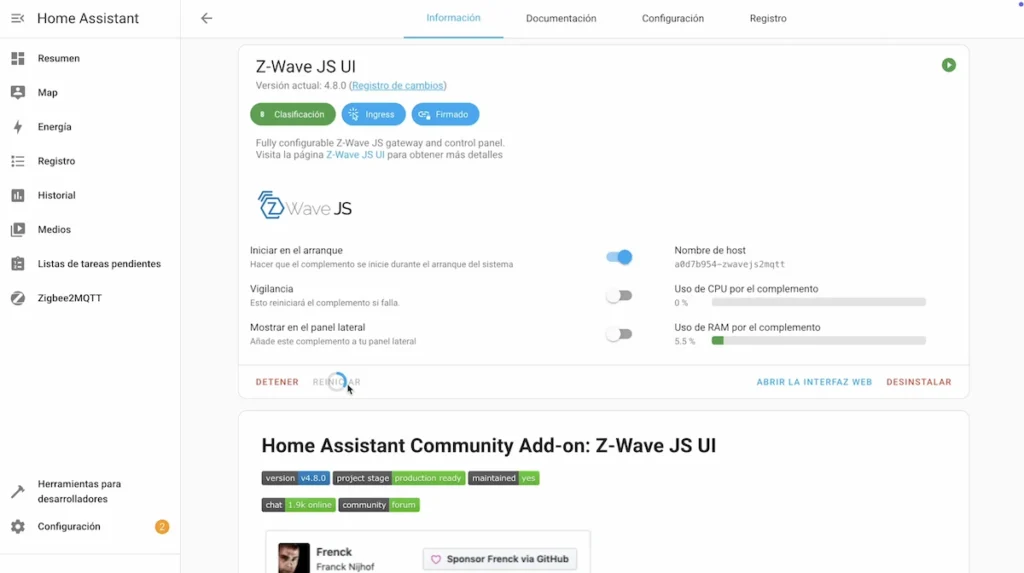
To perform this migration, I need to access the Z-Wave JS UI in Home Assistant.
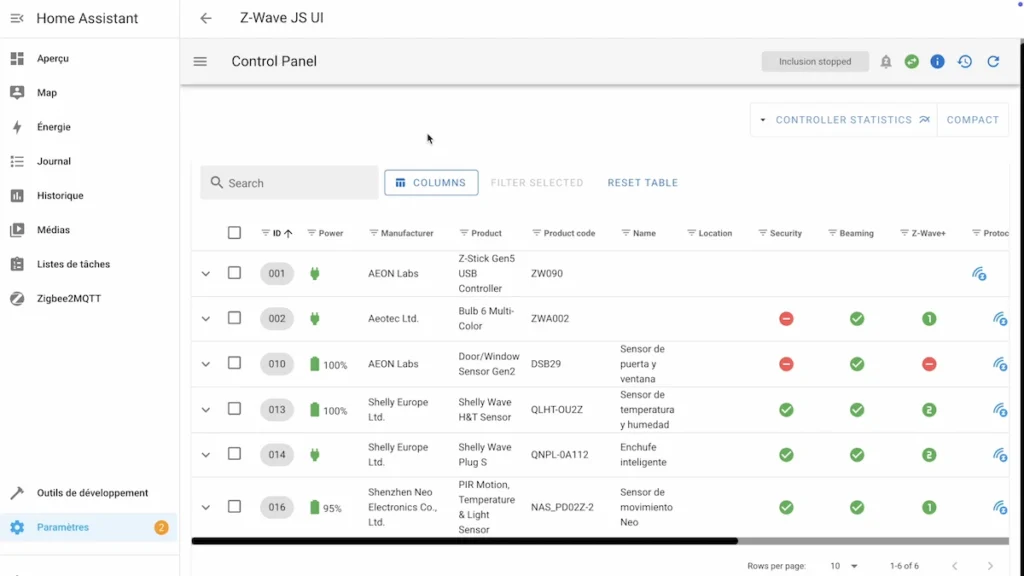
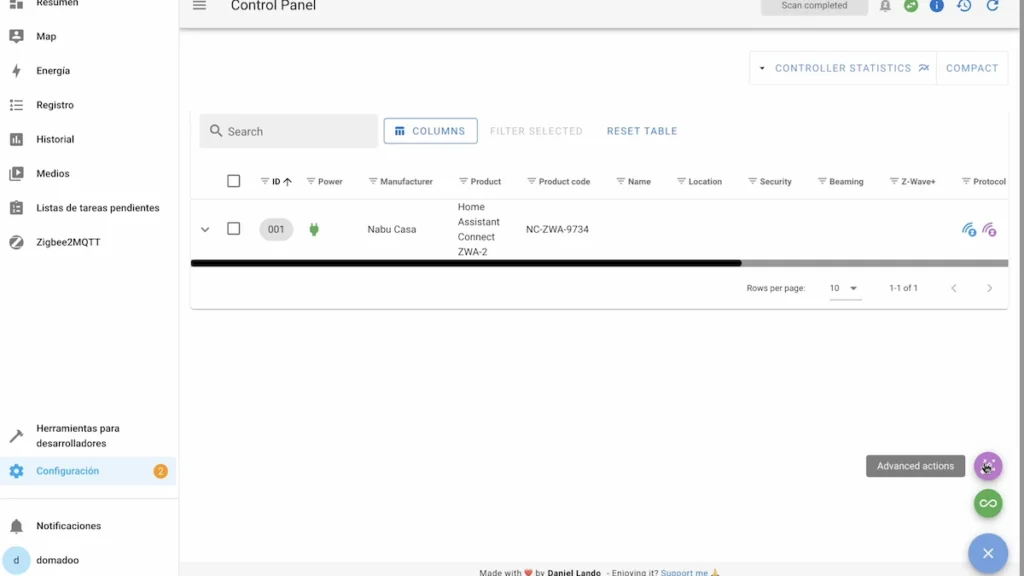
In this interface, I go to the configuration of my Aeotec dongle to check its SDK version, as Home Assistant indicates that, for this Z-Wave migration, we must have an SDK version 6.61 or higher. If this is not the case, you should check how to update this SDK version with your Z-Wave dongle. In my example, I have version 6.81.6, so I can perform this migration.

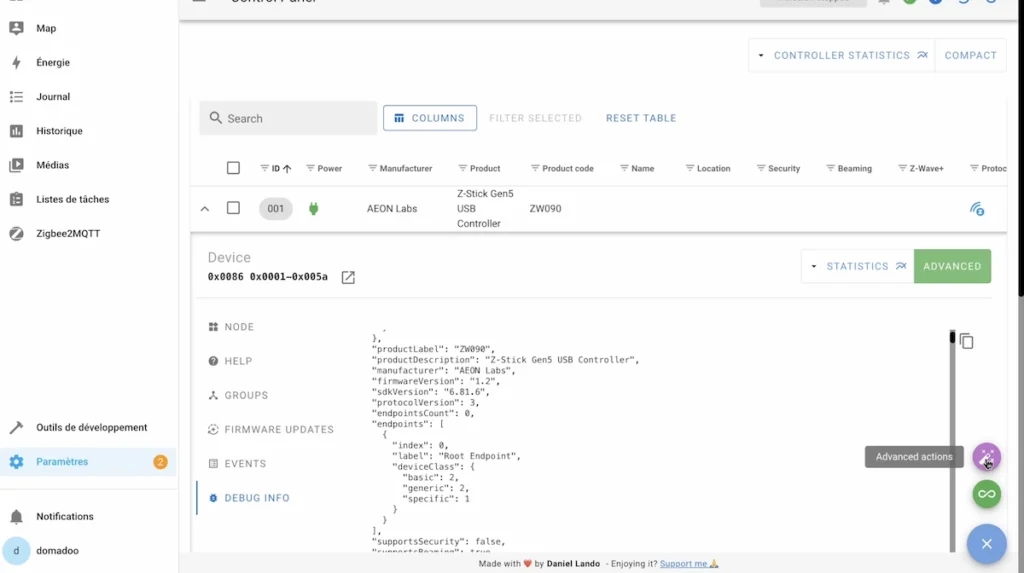
To do this, I must access the blue icon and click on “Advanced actions”.
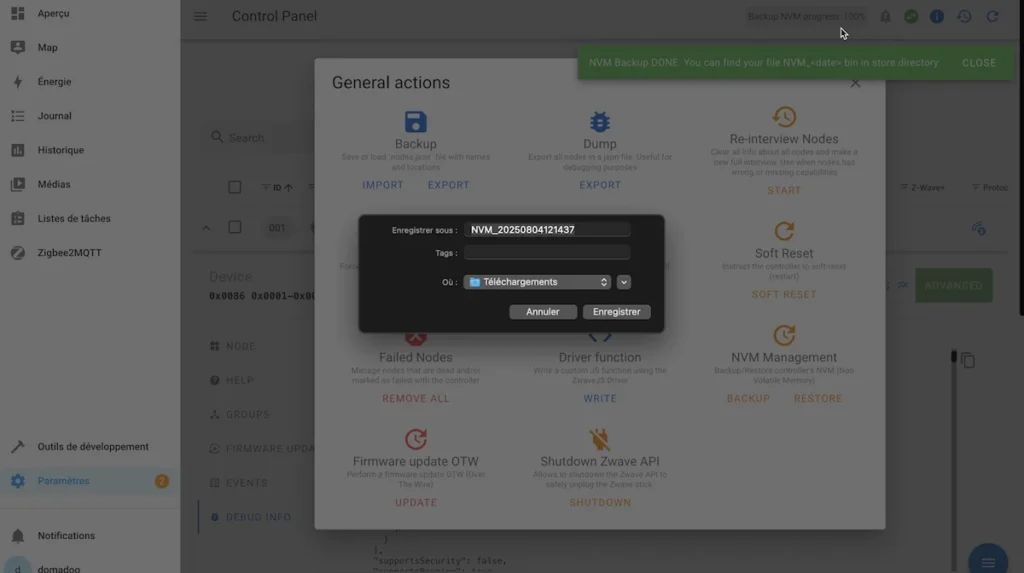
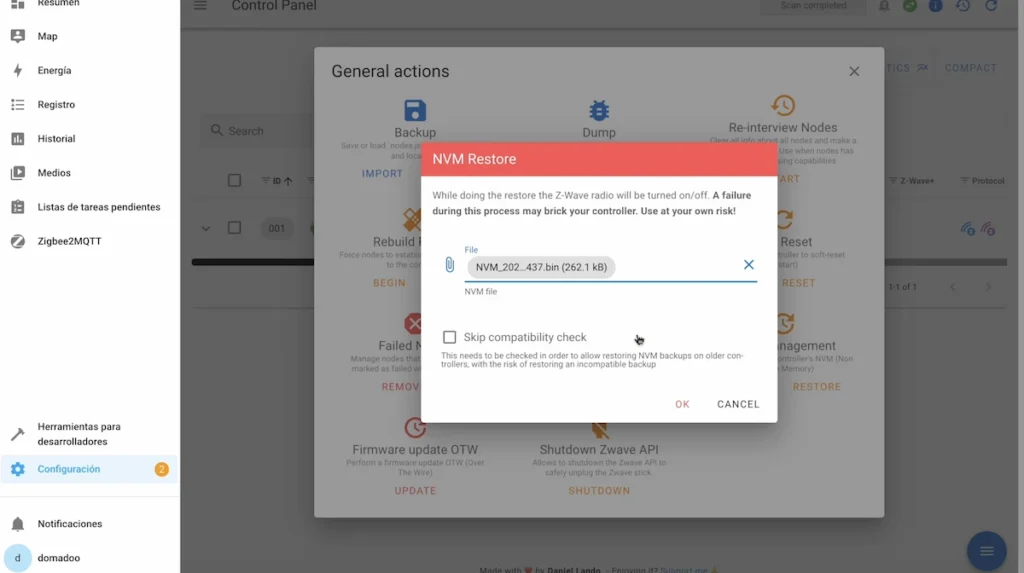
In “NVM Management”, click on “Backup” and we can see at the top that a backup is being generated with the progress in %.

Once this backup is generated, a pop-up window appears to download it.
Now that we have this backup, we can disconnect the Aeotec dongle from our Home Assistant hub.
And connect the ZWA-2 antenna.
We can restart the Z-Wave JS UI.
After a few seconds, we access the Z-Wave JS UI and go to “Configuration” and choose the port corresponding to our Z-Wave ZWA-2 antenna and click on save.

Now, click on the blue icon and click on “Advanced actions”.
In “NVM Management”, this time click on “Restore”.

Import the previously saved backup and click “Ok”.
That’s it, we now have all our devices imported from the old Aeotec dongle to this new Home Assistant antenna and, in my tests, they all work correctly.
How to use the Z-Wave Long Range
The Long Range has a different communication method than the standard Z-Wave.

With the Long Range, you will have direct communications between your home automation hub and your smart device, such as a plug, sensor, module or any other device.
And with this method, you will not have a meshed network between the devices, but the direct communication should be up to 1.5 km in free field, which is a much higher distance than the standard Z-Wave method, although, of course, indoors this distance is reduced by the various obstacles.

To test this function, go to “Settings”.
And “Complements”.

Access “Z-Wave JS”.

We go to “Configuration”.
Under “Radio Frequency Region”, select “Europe (Long Range)”.
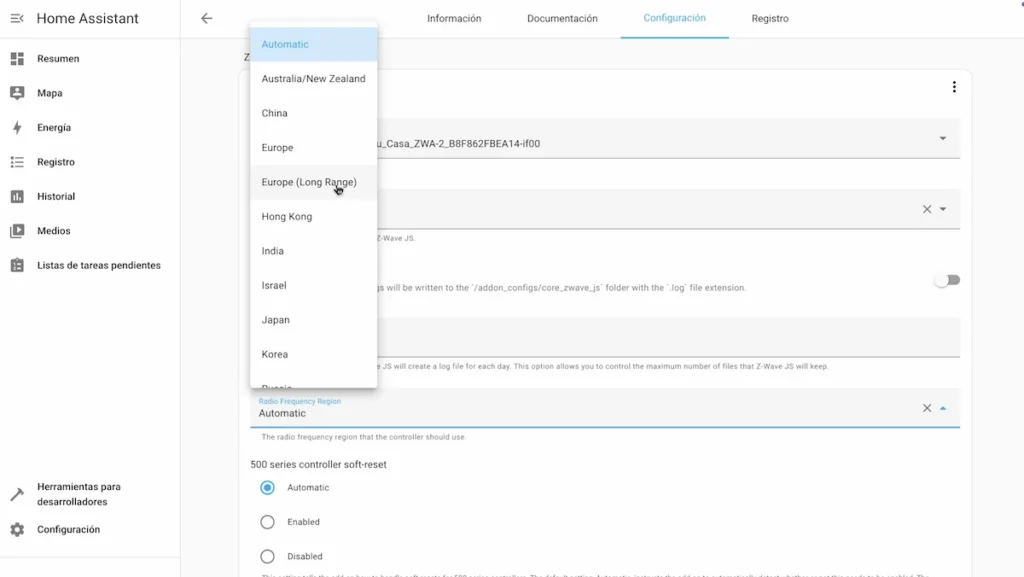
And click on “Save”.
Now, we restart the “Z-Wave JS” plug-in.
In order to use the Long Range, in addition to your ZWA-2 antenna that supports this function, you must also use Long Range compatible Z-Wave 800 devices.

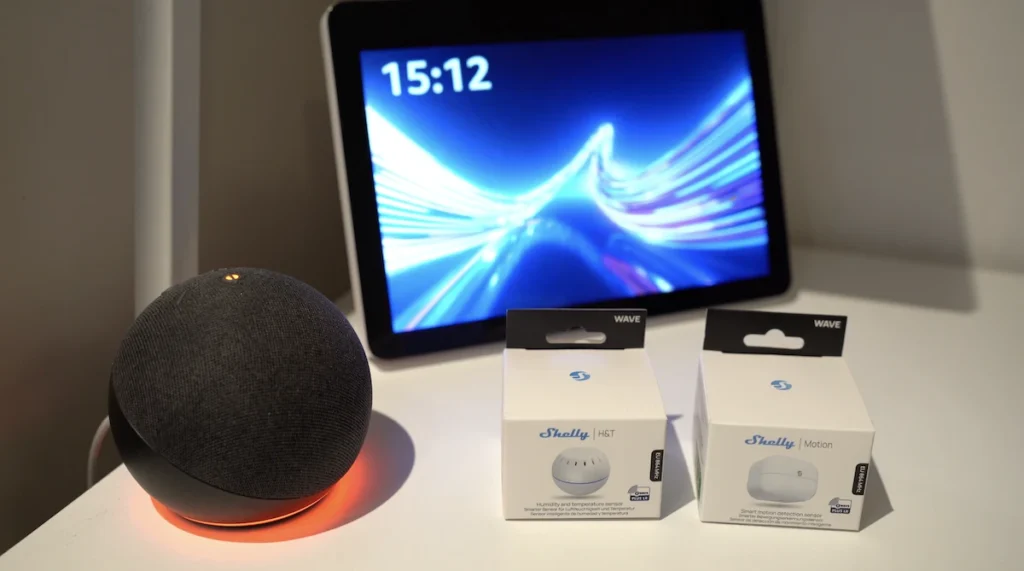
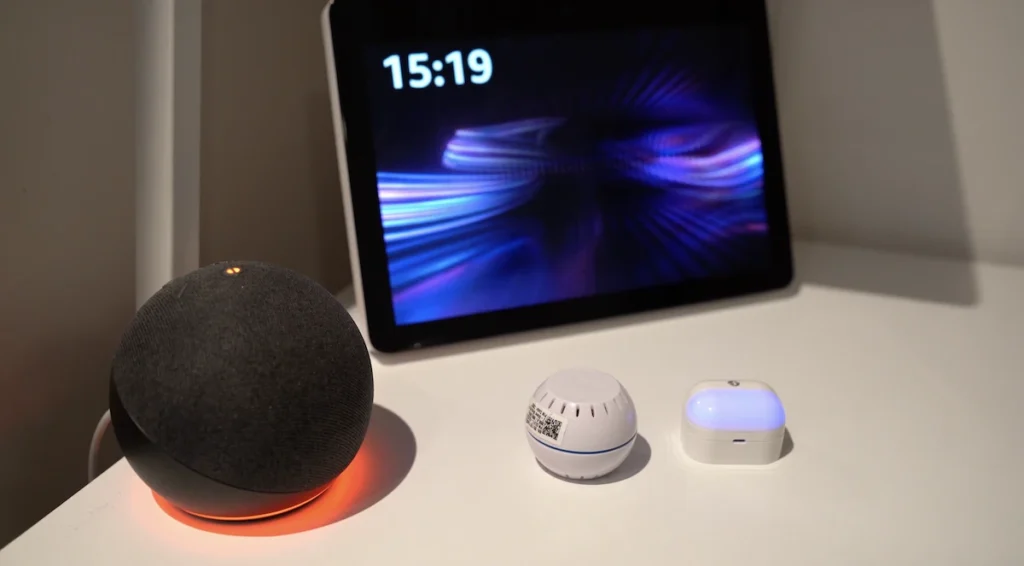
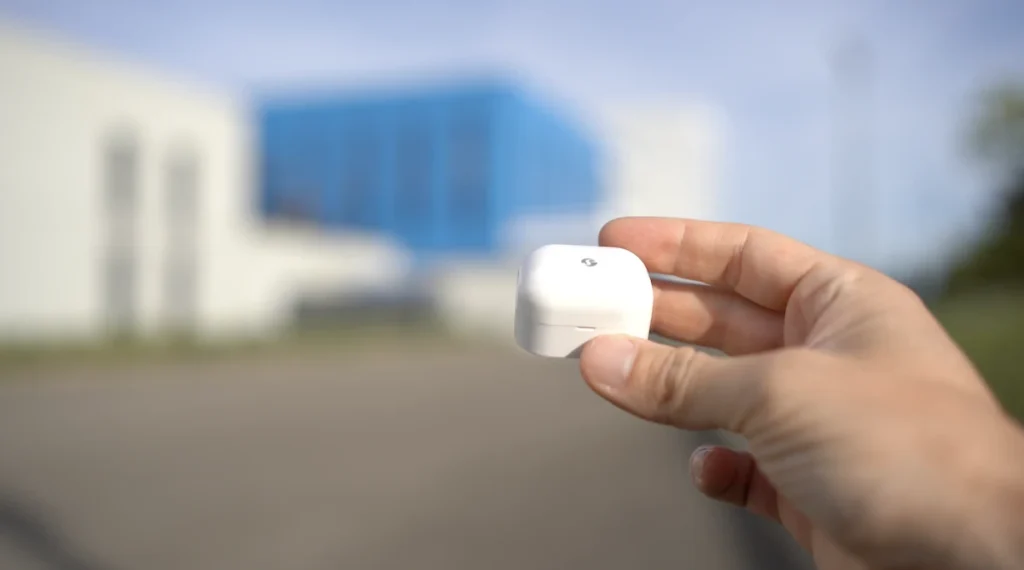
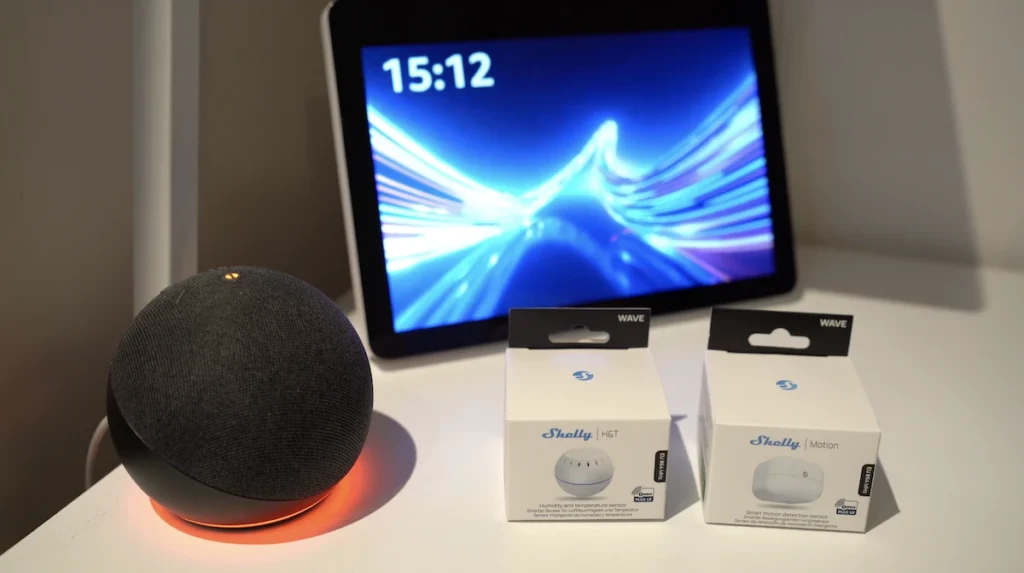
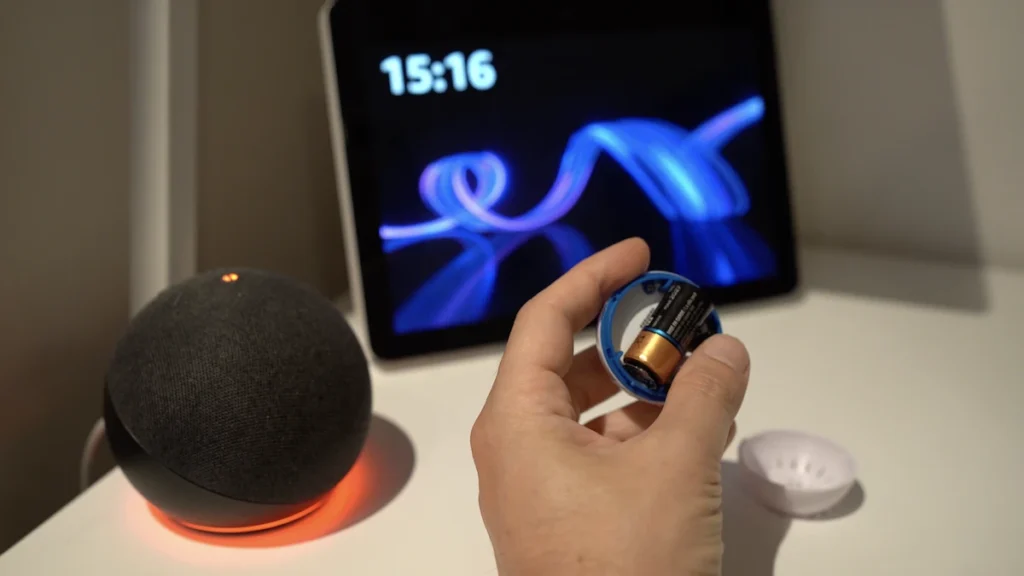
The company Shelly is launching Long Range devices on the market and we will test 2 of them: a temperature and humidity sensor and a motion sensor.
To link them, I’m going to use my phone and the Home Assistant app to scan their QR codes.

We go to “Configuration”.
And to “Devices and services”.
Click on “Add integration”.
Select “Add a Z-Wave device”.
At this point, we need to scan the QR code on the device, on a label inside the packaging or even on top of the packaging.

We can choose the type of network and, in our case, we will choose “Long Range”.
And we must stimulate our device by pressing its physical button so that it can finish the inclusion process.
That’s it, our device has been paired with the Long Range method and the process is similar with the second device we paired.
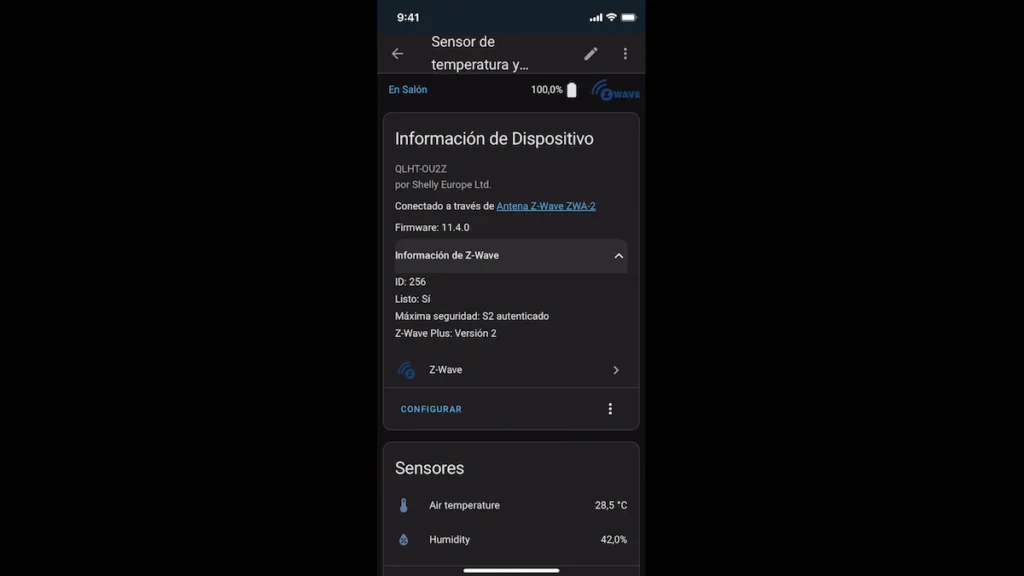
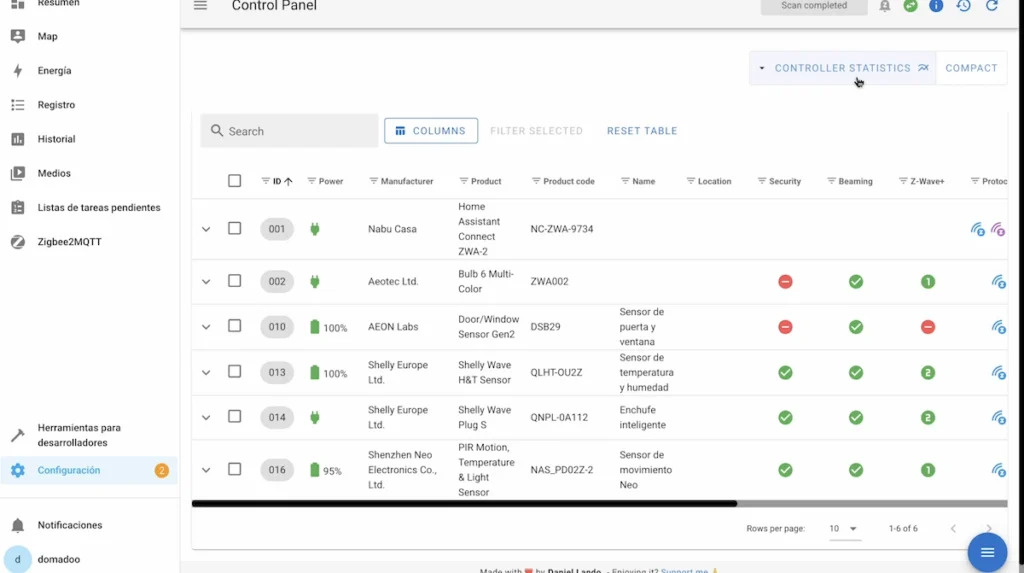
To verify that a Z-Wave device has been linked in the Long Range, one method is to look at its ID. With a Z-Wave device included with the standard method, its ID is generally between 2 and 232, with ID 1 being used by your Z-Wave controller. And ID values outside this range, as is the case with my Shelly devices, allow us to check that they have been linked in the Long Range. You can also check this if you use the Z-Wave JS UI interface.
To test the better communication range of the Z-Wave Long Range compared to standard Z-Wave, I tested 2 configurations:
- A Home Assistant Green hub with the Aeotec Z-Wave 500 dongle with the temperature and humidity sensor and Shelly motion sensor included in standard Z-Wave.
- A Home Assistant Green hub with Z-Wave ZWA-2 antenna with temperature and humidity sensor and Shelly motion sensor included in the Z-Wave Long Range.

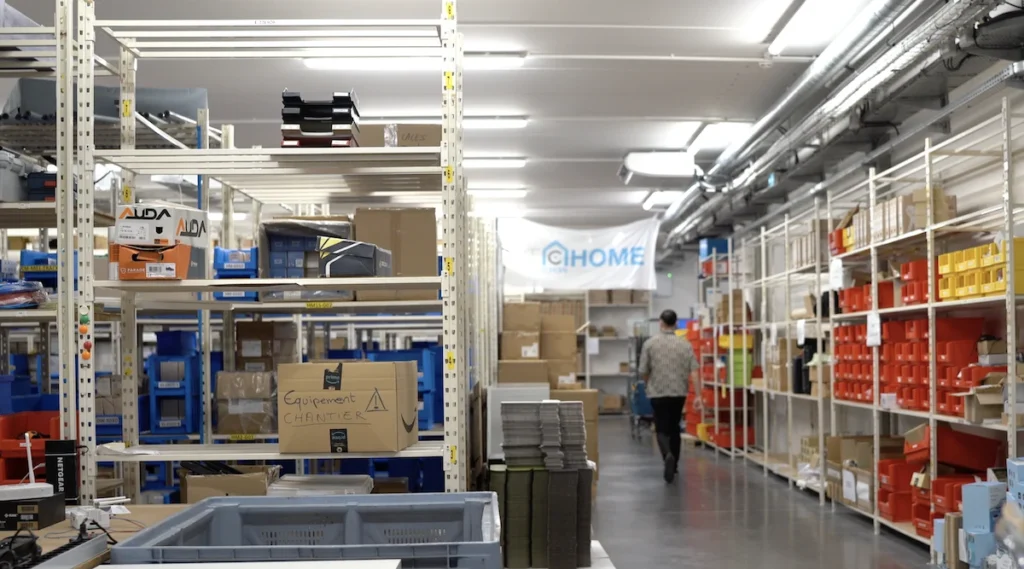
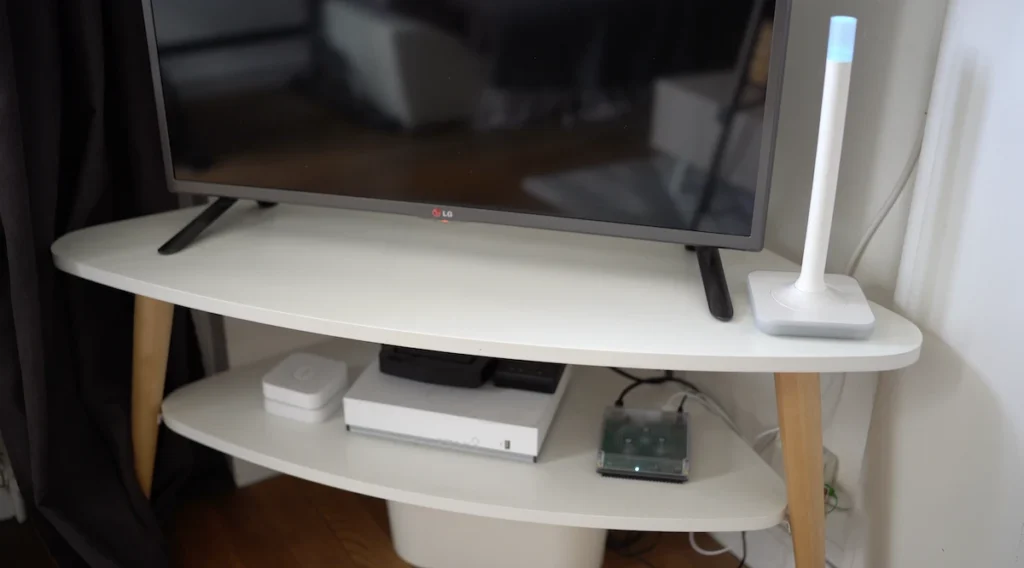
I have these home automation hubs in our office lab.
And these Shelly sensors have been installed in the back of our office, where we have our goods with different obstacles like thick walls and metal rails that weaken the signal a lot.
I have activated the RSSI history, an indicator of received signal strength from each Shelly device to check the quality of communications and after a whole day, I have been able to check this RSSI history of linked Shelly devices in Long Range and I have constant communications.
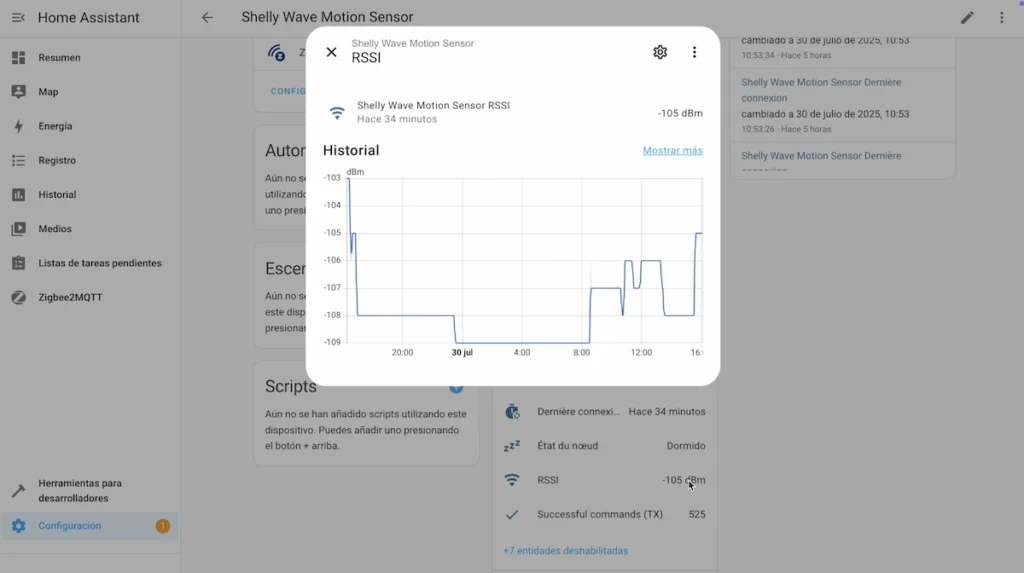
And a history of measurements over time.
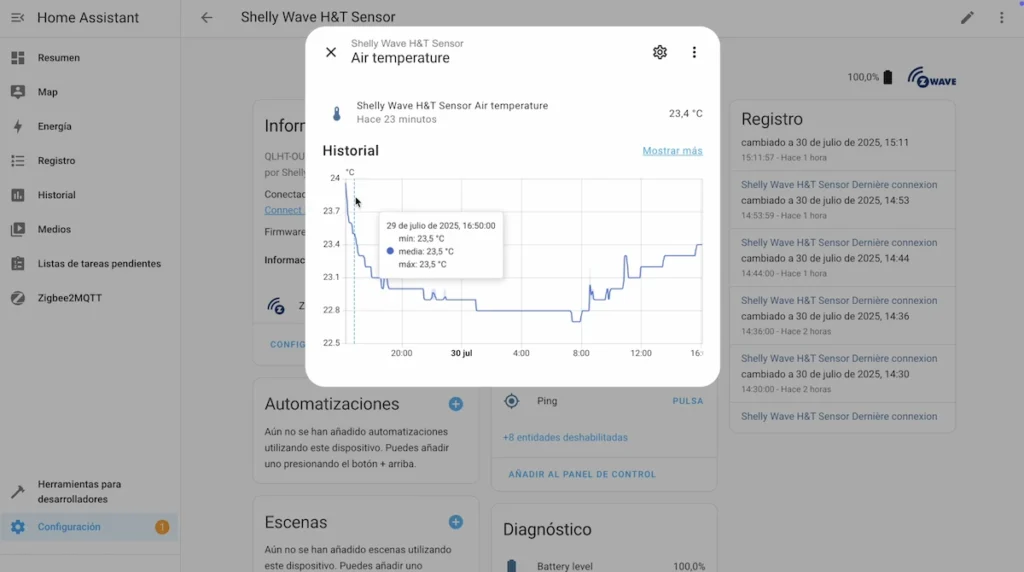
However, with standard Z-Wave I have no communication with Shelly devices.
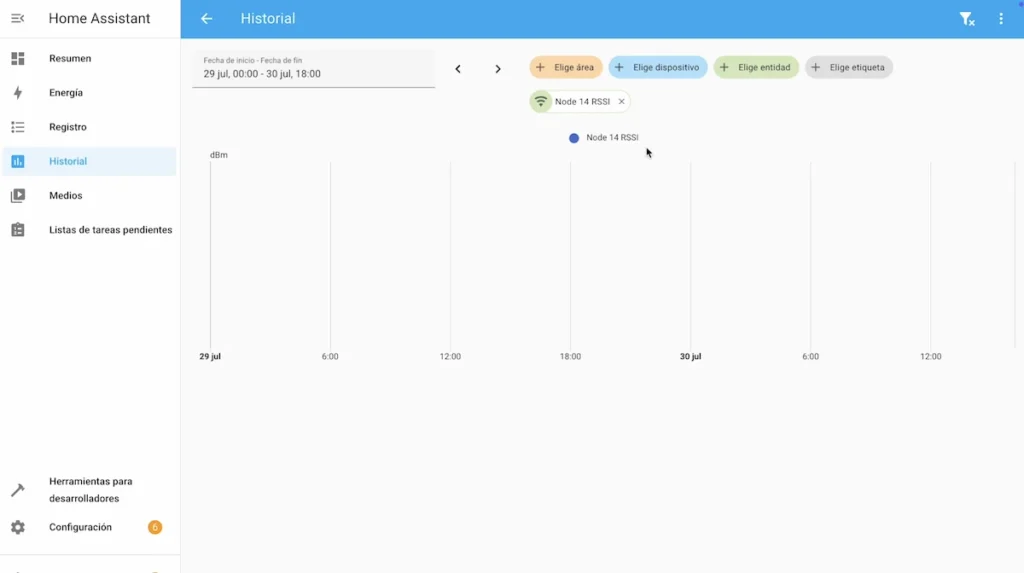
This may be an indicator that both this ZWA-2 antenna and the Long Range communication method allow us to have a better communication range.
And I have also tested direct communications from my Shelly temperature and humidity sensors outdoors with an obstacle being the wall of the building and, in this case, stimulating these sensors with their physical buttons.
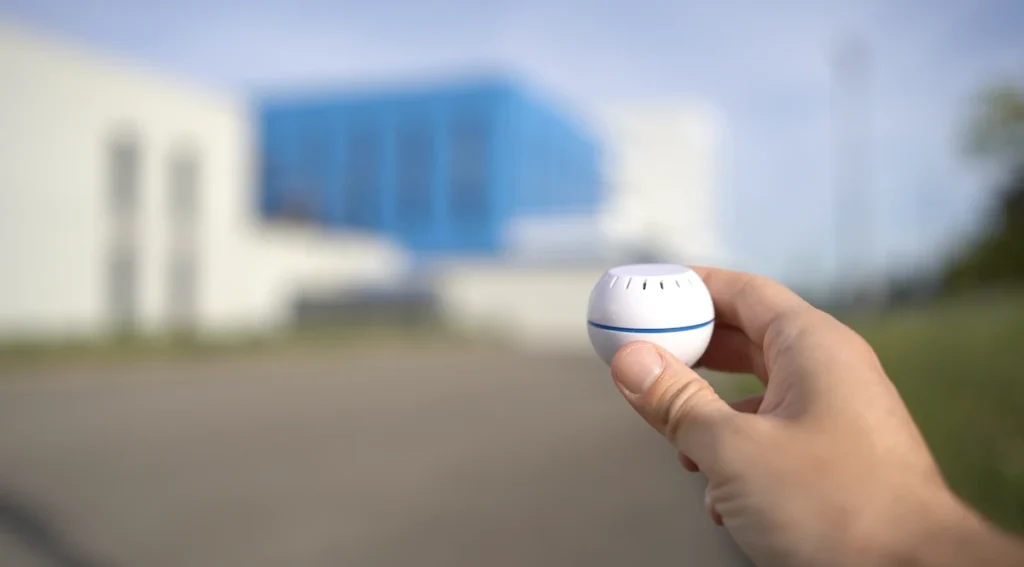
I have been able to see that I have a communication range of up to 25m with my sensor linked in standard Z-Wave with my Aeotec dongle and up to 50m with the Z-Wave Long Range and my ZWA-2 antenna.
So I have twice the range, although of course in my tests I only get up to 50 metres, as I don’t have ideal conditions and also my Shelly sensor, having a small internal antenna and being battery powered, must have an effect on the range of communications.

In short, Home Assistant once again shines a light on Z-Wave technology, which is all about a smart home for the best experience.

Generally purchased together


Buy Home Assistant Connect ZWA-2
Graduated with a Higher Technician’s Certificate in Home Automation, a Professional Bachelor’s degree in E-commerce and Digital Marketing, and a Master’s degree in SEO, I have been working since 2013 in a home automation e-commerce company called Domadoo, where I have the opportunity to test a large number of the popular Smart Home products on the market.